|
Usage of LCDStudio
In opposition to LCDHype the LCDStudio software is easier in the user handling and offers simpler drag’n’drop features to the connected hardware LCD display. The developer additionally offers good summary of all components. The disadvantage is the static usage of all components and less combination solutions.
Because of this, X-Sim delivers both plugin for each software. If you reach the end of LCDStudio, you can switch to LCDHype.
Installation:
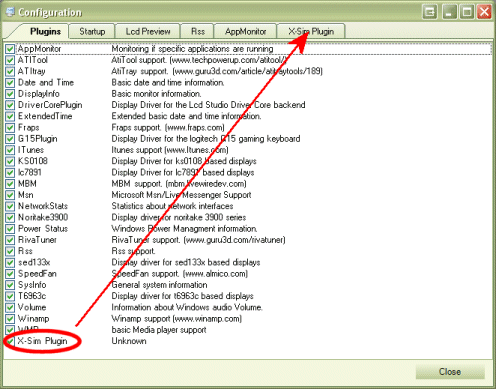
After the installation of the LCDStudio software you have to copy the X-Sim plugin files to the plugin directory of LCDStudio. Therefore you have to copy the two files XSimPlugin.plugin and XSimPlugin.dll to the root directory of your LCDStudio installation. You will find these two files in the “other stuff” directory of your X-Sim installation directory. Then you have to start LCDStudio and move to the option dialog page. There you have to select the X-Sim plugin out of the list. Is the selection is made, a additional tab will appear with a X-Sim notice. Please read carefully all of this content.

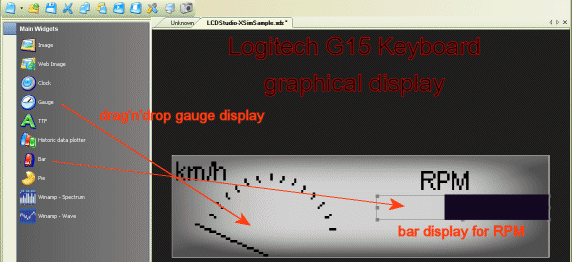
Then you can continue and generate a new hardware display page. (left symbol, empty text document symbol)
Now you can simply move a gauge element with drag’n’drop in the LCD panel display and change it in realtime to the hardware display.

True Type font text can also be inserted with drag’n’drop.
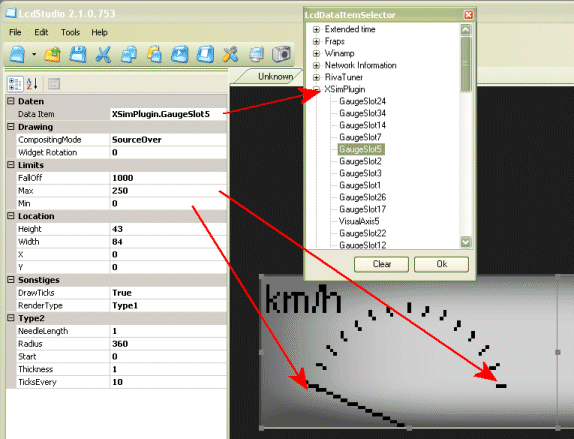
After you have created a visual gauge, you have to make a value cross linking to the Profiler2 gauge system. Therefore you have to select the same gauge slot as you have exported in the gauge setup as explained in the general gauge setup page of this manual.
Also you have to choose the minimum an maximum values of the highest and the lowest pointer display.

There is nothing more to do, please also read the general setup of the profiler gauge section.
|